
How to Fix a Ripped Duet Cover
You’re not alone if you’ve discovered a tear in your favorite duvet cover, whether from nightly use, pet claws, or an accidental snag. A rip doesn’t mean it’s time to replace the whole thing. With the right method and tools, you can repair it quickly, securely, and even stylishly. This guide covers how to fix ripped duvet cover fabric using proven techniques that stand up to washing and daily wear.
You’ll learn the best approach for every type of tear, including large rips, small holes, seam damage, and buttonhole failures. From invisible fixes to creative upgrades, these solutions restore both function and appearance to your bedding.
Assess the Damage Before Choosing a Repair
Before grabbing thread or tape, evaluate the rip. The location, size, and fabric condition determine your best repair strategy.
Check Fabric Type and Wear
Most duvet covers are made of cotton, cotton blends, or lightweight microfiber. Heavier weaves handle patches better, while thin or worn fabrics may need extra support like interfacing. If the fabric feels brittle or has multiple weak spots, consider decorative mending instead of invisible repair. It’s more sustainable and turns flaws into design features.
Identify Tear Location
- Center of panel: Use reverse appliqué or iron-on tape
- Near bottom hem or side seam: Reconstruct the seam
- At buttonhole or closure: Reinforce with webbing or a denim patch
- Cluster of rips: Trim into a clean shape and patch as one
Match the Method to Your Skill Level
If you don’t own a sewing machine, iron-on mending tape is your fastest option. For stronger, longer-lasting results, a machine with zigzag or honeycomb stitch capability is ideal. Hand-sewing works for small tears but lacks durability for high-stress areas.
Repair Large Tears With Reverse Appliqué
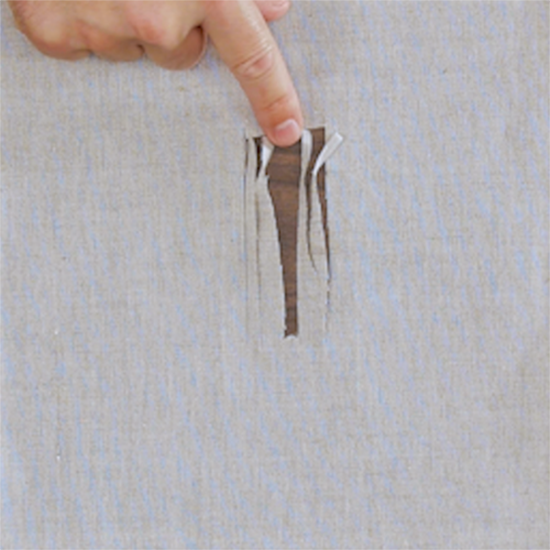
For rips bigger than 1 inch or multiple tears close together, this method creates a soft, durable fix without bulky layers.
Cut a Clean Opening
Turn the duvet cover inside out. Use chalk to outline a rectangle around the tear. With small scissors, cut along the lines to create a neat opening. Cut diagonally from the center of the damaged area toward each corner to achieve clean 90-degree angles.
Apply Fusible Tape
Flip to the wrong side. Place 1/4″ fusible tape (like Pellon EZ-Steam II) around the entire edge of the cut rectangle. Peel off the backing to expose the adhesive. This bonds the patch to the back without sewing first.
Iron On the Patch
Place a fabric swatch larger than the hole over the taped area on the back side. Press with a hot iron to fuse it in place. Use a pressing cloth to protect delicate fabrics. Once cooled, turn the cover right side out. The patch should now be visible through the opening.
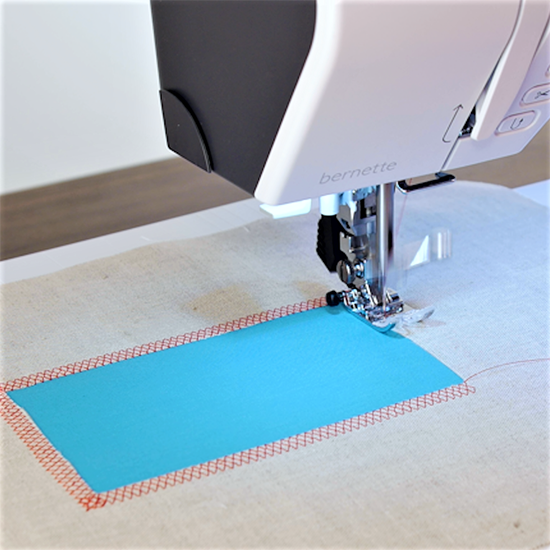
Stitch With a Honeycomb Pattern
Use a jeans 80 needle and matching thread. Set your machine to:
- Stitch Length: 1.5 mm
- Stitch Width: 7 mm (or 5.5 mm if that’s your machine’s max)
- Needle Position: Far Left
Position the presser foot so the leftmost swing of the needle lands just inside the patch, slightly off the original fabric edge. Sew all the way around the rectangle.
Pro Tip: Avoid satin stitch. It adds bulk and can cause the patch to ripple.
Lock the Stitch Start and End
To prevent unraveling after washing:
- Set stitch length to 0.5 mm
- Begin stitching 1/8″ before your starting point
- Reverse stitch back to the corner, then switch to honeycomb pattern
- Repeat at the end
This creates a secure anchor without knots.
Trim Excess and Finish
Turn to the back side. Use appliqué (duckbill) scissors to carefully trim away excess patch fabric, leaving only the stitched border. Press lightly with an iron to flatten the repair.
Quick Fix Using Iron-On Mending Tape
No sewing required? Use iron-on tape for small to medium rips in low-stress areas.
Prepare the Tear
Turn the duvet cover inside out. Align the torn edges neatly so they meet without gaps. Trim any loose threads.
Cut and Place Tape
Cut a piece of iron-on mending tape slightly larger than the rip. Place it over the seam with the adhesive side down, covering both sides of the tear.
Iron According to Instructions
Use a hot, dry iron with no steam. Press firmly for 10 to 15 seconds per section, moving across the tape to ensure full adhesion. Let cool completely before turning right side out.
Note: This method isn’t permanent for heavy-use items but extends life significantly. Avoid frequent washing or high heat.
Fix Tears on Lightweight Fabric
Thin duvet covers like sateen or microfiber are prone to spreading tears. Standard stitching can make the damage worse without support.
Remove Loose Threads
Gently pull any frayed threads. Don’t cut them flush yet, as this can worsen the tear.
Apply Lightweight Interfacing
Cut a piece of fusible interfacing slightly larger than the tear. Place it on the back side of the rip and iron to bond. This stabilizes the fragile fabric and gives the needle something to grip.
Sew With a 3-Step Zigzag
Set your machine to a 3-step zigzag stitch, not a standard zigzag. It takes three needle penetrations per zigzag motion, creating a tighter, stronger seam that resists stress.
- Use matching thread
- Keep stitches close together with a short stitch length
- Sew just over the edges of the tear to lock fibers
This combo prevents new tears from forming nearby.
Repair Bottom Edge Tears by Reconstructing the Seam
Tears near the bottom hem are common due to footboard contact or dragging on the floor.
Evaluate Fabric Availability
Check the top of the duvet cover. If there’s extra length, you can flip it and create a new bottom hem, hiding the damage entirely.
Turn and Resew the Hem
- Remove the old stitching at the bottom
- Trim away damaged fabric
- Fold the cover so the good fabric becomes the new bottom edge
- Iron a new hem 1 to 2 inches deep
- Sew with a straight stitch close to the inner fold
Reinforcement Tip: Sandwich twill tape in the new seam for added strength.
If no extra fabric exists, patch the area from the inside using reverse appliqué or fusible tape, but expect reduced durability.
Fix Ripped Buttonholes

Buttonholes endure constant stress. A small rip here can quickly become unbuttonable.
Use Fusible Webbing
Cut a tiny square of HeatnBond or similar webbing. Place it behind the torn buttonhole and iron to adhere. Then sew a new buttonhole over the reinforced spot using matching thread.
Try Fabric Glue
Apply a small drop of E6000 or Aleene’s to the back of the hole. Press flat and let dry 24 hours. This seals fibers and adds stability before restitching.
Add a Denim Patch
Cut a 1″ square from old jeans. Place it behind the hole and hand-stitch around the edge with a whipstitch. The contrast fabric gives a rugged, intentional look.
Cover With Mending Tape
Use Dritz Fix-It Tape on the back side. Iron it on, then sew a new buttonhole through the tape. This combines adhesive and stitching strength.
Decorative Cover-Up
Sew a small fabric-covered button over the hole. Or use a brooch or safety pin as a temporary but stylish fix. Some people do this on purpose.
Choose the Right Patch Material
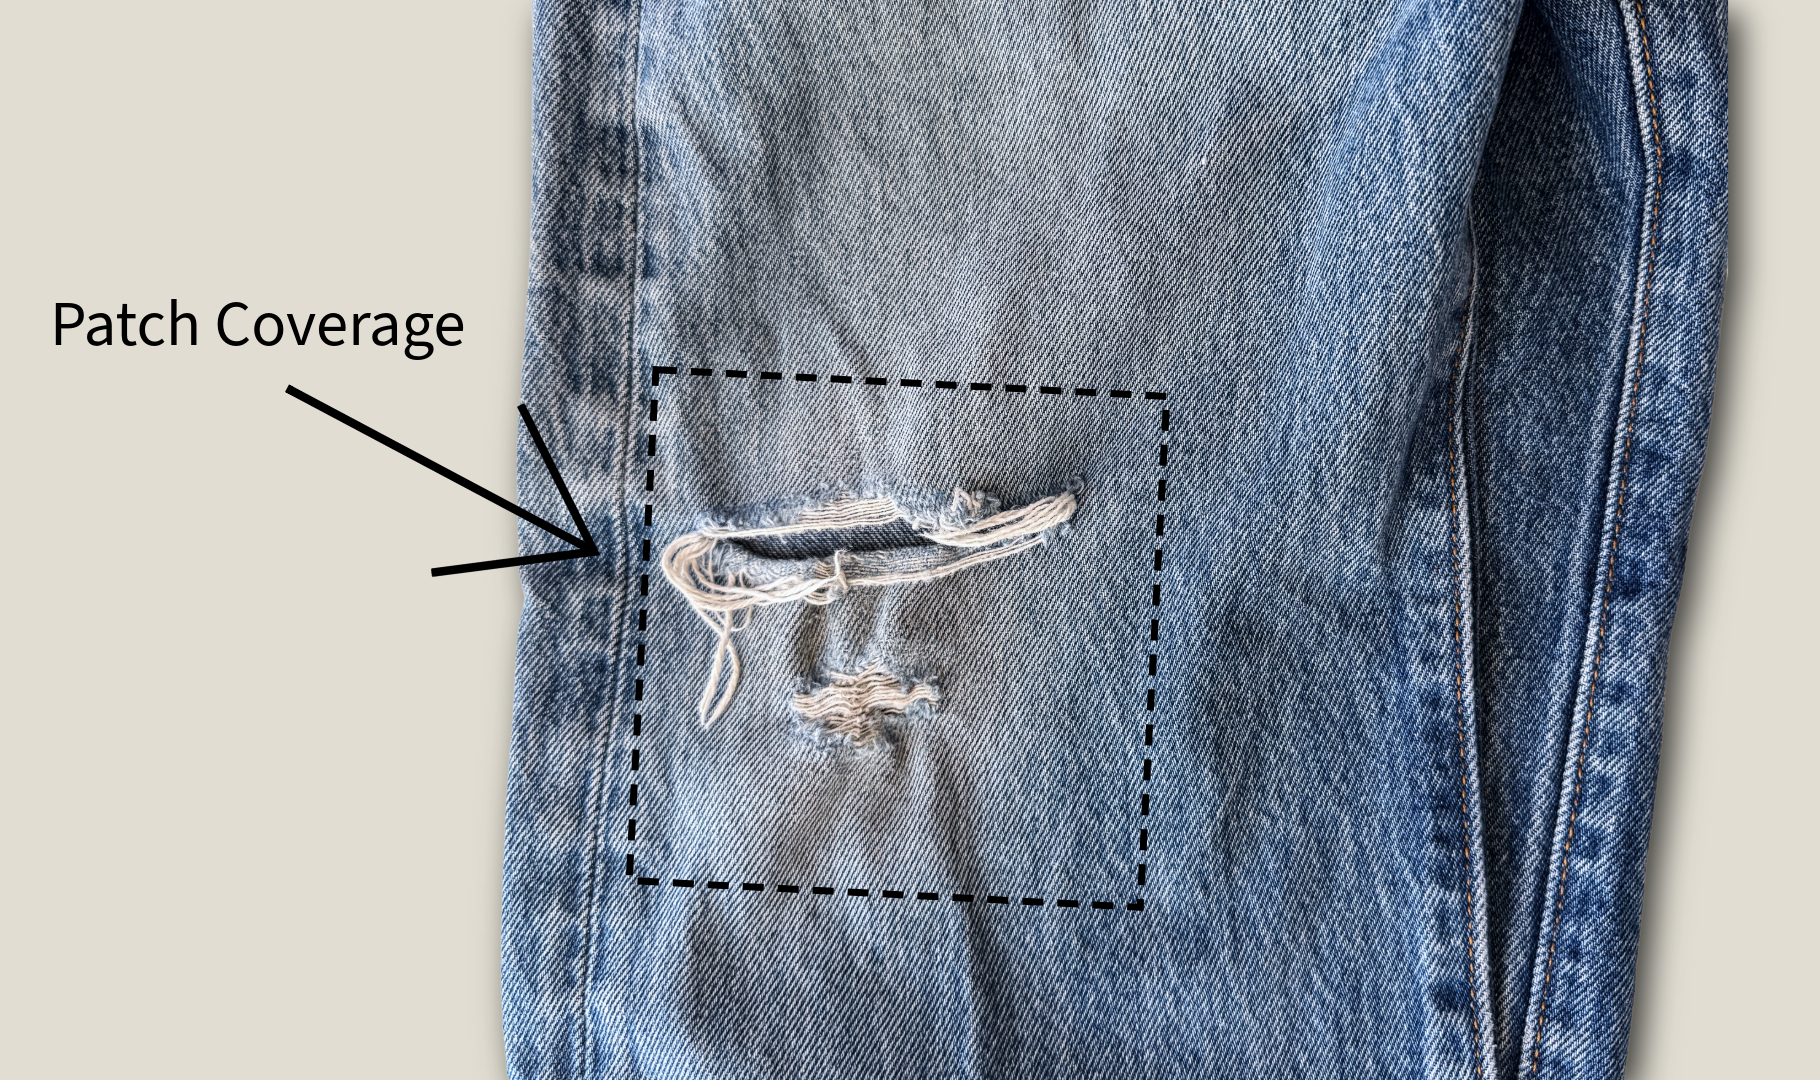
Your patch fabric affects durability, washability, and appearance.
Matching Fabric
Best for invisible repairs. Use leftover fabric from the original duvet or cut from an inconspicuous area like inside a hem.
Contrasting or Decorative Fabric
Turn the repair into art. Use patterned cotton, embroidered swatches, or vintage scraps. Works well with reverse appliqué.
Denim or Twill
Strong, durable, and frays less. Ideal for high-stress zones or kids’ bedding.
Pre-Embroidered Patches
Iron-on embroidered patches save time and add instant charm. Just reinforce the back with stitching for wash safety.
Prevent Future Tears
A repaired duvet cover needs care to avoid new damage.
Wash Gently
Use cold water and a delicate cycle. Turn the cover inside out before washing to protect seams and prints.
Avoid Overloading
Too much in the washer causes friction and stress on weak spots.
Store Properly
Fold neatly and don’t cram into tight spaces. Avoid plastic bins that trap moisture. Use breathable cotton bags instead.
Rotate Bedding
Use two duvet covers and switch weekly. This reduces wear and extends lifespan.
Turn Repairs Into Design Features
When fabric is too worn for invisible fixes, embrace mending as style.
Embroider Over the Patch
Stitch flowers, vines, or geometric shapes onto the patch before attaching it. Use embroidery floss for bold color.
Piece a Scrap Block
Combine fabric scraps into a “scrappy block” and use it as a large patch. Great for boho or farmhouse styles.
Enlarge Into a Design Shape
Turn a messy tear into a perfect circle or square. Patch it with a bold fabric that stands out intentionally.
Add Decorative Stitching
Instead of honeycomb, use lace, wave, or blanket stitches to outline the patch. This makes the repair part of the aesthetic.
Troubleshoot Common Repair Issues
Patch Feels Stiff
You used too dense a stitch like satin or layered too many fabrics. Stick to honeycomb or zigzag and trim excess backing.
Edges Are Fraying Again
The stitching didn’t catch the very edge. Next time, ensure the needle swings just inside the original fabric border.
Repair Came Undone After Washing
Start and end points weren’t secured. Always use reverse stitching or 0.5 mm lock stitches at the beginning and end.
Iron-On Tape Failed
The surface wasn’t clean, or the iron wasn’t hot enough. Always pre-wash and dry the area, and press firmly for 15 seconds.
New Tear Nearby
The fabric is worn out, and repairs can’t fix aged fibers. Consider retiring the cover or using decorative mending to accept its age gracefully.
Frequently Asked Questions About Fixing a Ripped Duvet Cover
Can I fix a duvet cover without sewing?
Yes. Iron-on mending tape is the fastest no-sew option for small to medium rips. Apply the tape over the aligned tear on the wrong side, then press with a hot, dry iron for 10 to 15 seconds. This creates a serviceable repair that extends the cover’s life, though it isn’t as durable as stitching.
What stitch is best for patching a duvet cover?
The honeycomb stitch works best for patches. It secures the layers without adding bulk or causing the fabric edge to ripple. Set your machine to 1.5 mm stitch length, 7 mm stitch width, and far-left needle position for optimal results.
How do I repair a tear in lightweight fabric?
Use fusible interfacing on the back of the tear to stabilize the fragile fabric, then sew with a 3-step zigzag stitch. The interfacing gives the needle something to grip and prevents the tear from spreading under stress.
What if the tear is near the bottom hem?
Reconstruct the seam by flipping excess fabric from the top to create a new bottom hem. Remove the old stitching, trim damaged fabric, fold a new hem 1 to 2 inches deep, and sew with a straight stitch. Add twill tape inside the seam for reinforcement.
How do I fix a ripped buttonhole?
Reinforce the area with fusible webbing like HeatnBond, fabric glue such as E6000, or a small denim patch. Once the backing is secure, sew a new buttonhole over the reinforced spot using matching thread.
When should I replace instead of repair?
If the fabric feels brittle, has multiple weak spots, or tears keep appearing near your repairs, the material has reached its wear point. In that case, decorative mending or replacement is more practical than repeated invisible repairs.
Key Takeaways for Repairing a Ripped Duvet Cover

Knowing how to fix ripped duvet cover fabric saves money, reduces waste, and keeps your bedding looking fresh. Match the technique to the tear: large rips need structured patching with reverse appliqué, edge tears benefit from seam reconstruction, and worn fabrics can become canvases for creative expression.
Start by assessing the damage and gathering the right materials. For most repairs, a jeans 80 needle, matching thread, fusible tape, and a hot iron cover nearly every scenario. With the right tools and about 30 minutes of effort, your duvet cover can look and last like new.