
How to Dry a Duvet Quickly
Waking up to a damp, lumpy duvet after washing can be frustrating, especially when you discover musty smells or flat, clumped filling. Knowing how to dry a duvet correctly is essential for preserving its fluffiness, insulation, and longevity. Whether your comforter is filled with down, feathers, or synthetic fibers, improper drying can lead to permanent damage, mildew growth, or even machine breakdowns. The key lies not just in choosing between tumble drying and air drying, but in following precise steps that protect the fabric, distribute the filling evenly, and ensure complete moisture removal.
From checking care labels to using tennis balls in the dryer and verifying full dryness before storage, every step matters. You’ll also discover material-specific tips, learn to troubleshoot common issues like clumping or lingering odors, and avoid the top mistakes that could shorten your duvet’s lifespan. Let’s get your comforter fluffy, fresh, and fully dry every time.
Check the Care Label First
Before tossing your duvet in any dryer, always read the manufacturer’s care label. This small tag holds critical instructions about water temperature, detergent use, and whether the duvet can be machine dried or requires professional cleaning. Ignoring these guidelines can void warranties or permanently damage delicate fillings. Some high-end down duvets may need professional dry cleaning only, while many synthetic options are safe for home tumble drying. If the label is missing or unclear, assume caution and opt for air drying or consult the brand’s website.
What to Look For on the Label
- Dryer-safe symbols: A square with a circle means tumble drying is allowed.
- Heat restrictions: A single dot indicates low heat; two dots mean medium.
- Wash instructions: Helps determine pre-drying preparation, such as rinsing thoroughly.
- Professional cleaning symbols: A letter “P” in a circle means dry clean only; do not machine dry.
Remove the Cover Before Drying
Never dry a duvet inside its cover. While it might seem convenient, doing so creates serious risks. A wet duvet, especially one filled with down or feathers, becomes extremely heavy. Trapping it inside a cover during drying increases imbalance in the machine, leading to violent shaking, drum strain, or motor damage. More importantly, the enclosed space restricts airflow and prevents proper tumbling, resulting in uneven drying and clumped filling.
Risks of Skipping Separation
- Machine damage: Imbalanced loads can cause front-loading washers to walk across the floor or stop mid-cycle.
- Filling destruction: Wet down or synthetic fibers compress under pressure, losing loft permanently.
- Trapped moisture: Covers prevent evaporation, increasing the risk of mildew forming inside the core.
When It Might Be Acceptable
Only in rare cases, such as lightweight synthetic summer duvets in large-capacity front-loaders (4.5+ cu. ft.), is drying with the cover potentially safe. But even then, separation remains the best practice. Always remove the duvet from its cover immediately after washing and lay it flat to inspect for tears or shifting filling.
Use Low Heat Only
High heat is the enemy of duvets. Whether filled with natural down or synthetic fibers, excessive temperatures can scorch fabric, melt polyester clusters, or strip essential oils from feathers, leaving them brittle and lifeless. To preserve softness and loft, always use a low heat or air fluff setting on your dryer.
Why Low Heat Works Best
Low heat gently evaporates moisture without damaging sensitive materials. It allows time for deep layers of filling to dry thoroughly, reducing the risk of hidden dampness that leads to mold. While it takes longer than high-heat cycles, the trade-off is a fluffier, longer-lasting duvet.
Settings to Avoid
- High heat
- Heavy-duty cycles
- Short timed cycles that won’t run long enough
Instead, opt for extended tumble cycles with no heat or minimal warmth. If your dryer has a bedding or bulky setting, use it. That setting is designed for large, thick items like comforters.
Dry for 4–6 Hours Minimum
Drying a duvet isn’t a quick job. Expect to run the dryer for at least 4 to 6 hours, even on low heat. Standard cycle timers often shut off before the center of the duvet is fully dry, especially with thick or down-filled models. Don’t rely on auto-sensors. They can give false readings due to surface dryness masking internal moisture.
How to Manage Long Cycles
- Set reminders to check progress every 30 to 60 minutes.
- Use a commercial dryer at a laundromat if your home machine lacks capacity or time settings.
- Never leave the dryer unattended for long periods. Stop and inspect regularly.
Add Tennis Balls or Dryer Balls

To keep your duvet fluffy and prevent filling from clumping, add mechanical aids to the dryer drum. Clean tennis balls, wool dryer balls, or plastic spiky balls bounce around during tumbling, breaking up wet clusters and forcing air into the core of the fabric.
Best Options for Loft Restoration
- Tennis balls: Durable and effective; use 2 to 3 per load.
- Wool dryer balls: Naturally soften fabric and reduce drying time.
- Clean canvas shoes: A pair of lightweight sneakers can serve as heavy-duty agitators.
Place them directly in the dryer with the duvet. They help redistribute filling, improve airflow, and shorten drying time by preventing dense packing.
Pro Tip: Drop a few drops of essential oil (like lavender or eucalyptus) onto wool dryer balls before starting. This adds a fresh scent without using chemical fabric softeners, which can harm duvet fibers.
Stop and Fluff Every 30 Minutes
Passive drying won’t cut it for thick comforters. To ensure even drying and prevent clumping, adopt the intermittent fluffing technique. Every 30 minutes, stop the dryer and remove the duvet.
What to Do During Breaks
- Shake the duvet vigorously to redistribute filling.
- Smooth out corners and edges where moisture collects.
- Feel for cool or heavy spots. These indicate wet areas needing more time.
- Rotate the duvet in the dryer (flip end-to-end) for balanced exposure.
This hands-on approach mimics professional fluffing and dramatically improves results, especially for down-filled duvets prone to clumping.
Air Dry in Sunlight When Possible
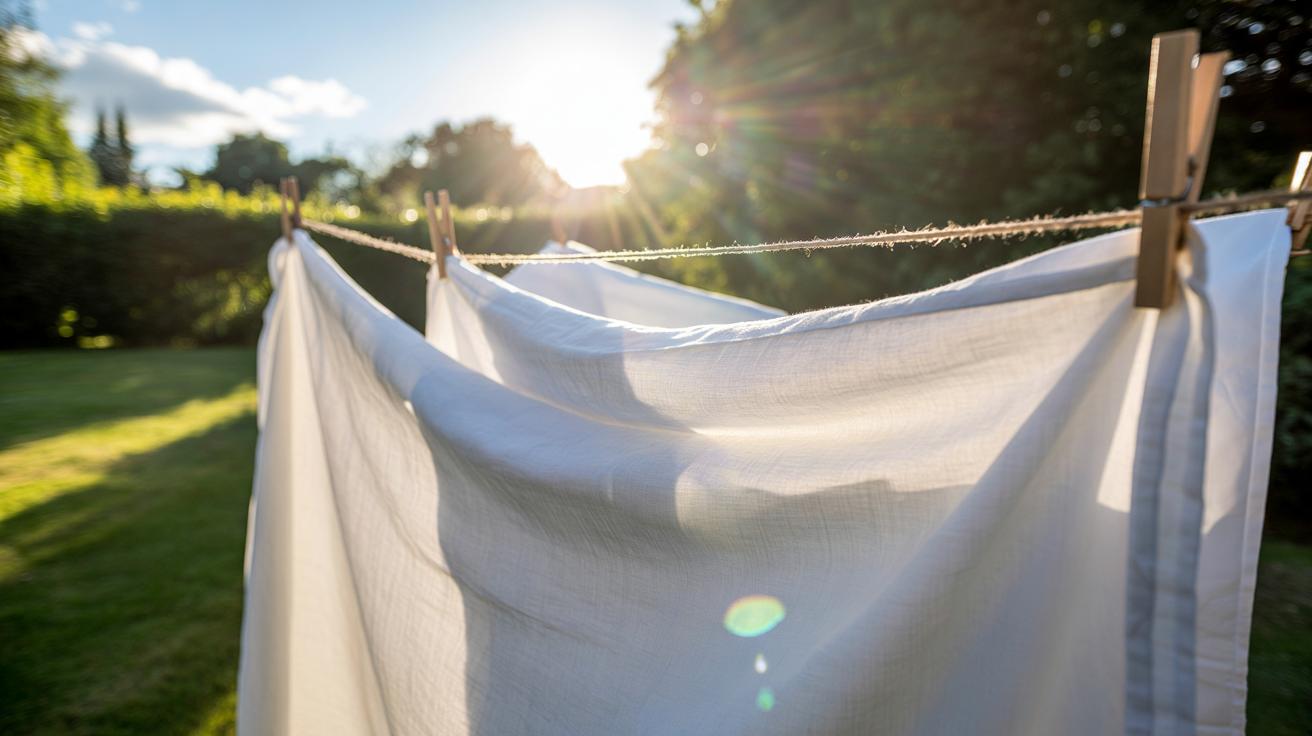
If you don’t have access to a large dryer or prefer an eco-friendly option, air drying works, but it requires careful setup and patience. Hang the duvet on a sturdy clothesline or lay it flat over a wide drying rack.
Best Conditions for Air Drying
- Direct sunlight: UV rays kill bacteria and neutralize odors.
- Low humidity: Dry, breezy days speed evaporation.
- Good airflow: Use a fan indoors if drying inside.
Avoid hanging a wet duvet on thin lines that can cause creasing or stress seams. Instead, drape it over a broad surface to support its weight evenly. Turn the duvet every few hours to expose all sides to air. Total drying time can reach up to 24 hours, depending on thickness and weather.
Test for Full Dryness Before Storage
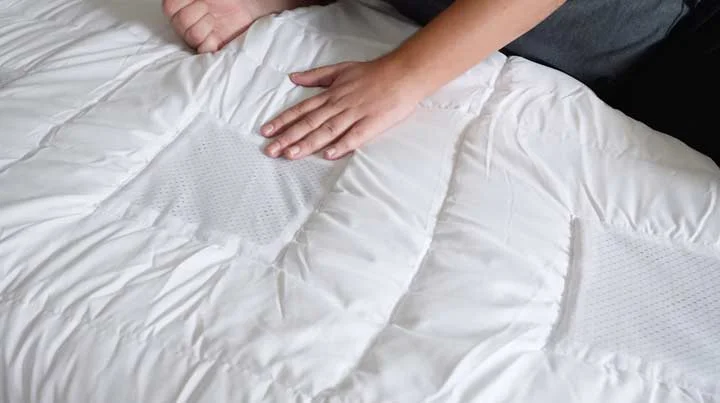
Never store a duvet unless it’s 100% dry. Even slight dampness inside the filling can lead to mold, mildew, and foul odors that are nearly impossible to remove later.
The Center Touch Test
Before removing from the dryer or taking it off the line:
- Press your hand deep into the center of the duvet.
- Feel for coolness, heaviness, or soft spots. These are signs of residual moisture.
- The fabric should feel warm (from tumbling) and uniformly dry.
If in doubt, return it to the dryer for another 30 to 60 minutes and retest. When in question, dry longer. It’s better to over-dry slightly than risk mildew.
Store in Breathable Containers
Once fully dry, store your duvet properly to maintain freshness and prevent pest infestations.
Ideal Storage Materials
- Cotton storage bags
- Cardboard boxes with ventilation
- Wooden or rattan chests
These allow airflow, preventing trapped moisture that leads to mildew. Avoid plastic bags or sealed plastic bins. They trap humidity and create a breeding ground for mold, even if the duvet was dry when stored.
Add Natural Pest Deterrents
Place cedar chips in the storage container to repel moths. For a pleasant scent, add sachets of lavender, mint, or dried rosemary. Replace every 3 to 6 months for continued protection.
Follow Material-Specific Rules

Different fillings require tailored drying approaches. Applying the wrong method can ruin performance and comfort.
Down and Feather Duvets
Natural down excels at insulation but demands careful handling. Use low heat or air fluff only, add 2 to 3 tennis balls to restore loft, and dry immediately after washing. Expect 5 to 6 hours in the dryer with frequent fluffing. Air drying in direct sun helps disinfect feathers, but limit UV exposure to 2 to 3 hours to prevent fabric fading.
Synthetic (Polyester) Duvets
Easier to care for, but still need attention. Synthetic duvets can tolerate slightly higher heat (though low is still best) and dry in 3 to 4 hours in the dryer. They still benefit from dryer balls to maintain puffiness and are ideal for allergy sufferers due to mite resistance.
Prevent Common Drying Mistakes
Even experienced users make errors that compromise duvet quality. Avoid these pitfalls:
- Using fabric softener or bleach: These coat fibers, reducing absorbency and loft. Use a mild detergent formulated for delicates or down instead.
- Skipping the fluffing step: Failing to stop and fluff leads to stubborn clumps that won’t come out after drying.
- Overloading the machine: Ensure your dryer has at least 4.5 cubic feet of capacity. A cramped drum prevents tumbling and strains the motor.
Troubleshoot Drying Problems
Encountering issues? Here’s how to fix them fast.
Filling Is Clumped
Cause: Lack of agitation during drying.
Fix: Restart the dryer with 2 to 3 tennis balls. Stop every 30 minutes to shake and fluff by hand.
Still Damp After Hours
Cause: High humidity, overloaded machine, or low heat turned off prematurely.
Fix: Extend drying time, add a fan, or move to a commercial dryer. Ensure low heat remains active.
Smells Musty
Cause: Stored while damp or dried too slowly.
Fix: Rewash with vinegar (½ cup) to eliminate odor, then dry thoroughly with increased airflow.
Feathers Poking Through
Cause: High heat or rough handling damaged fabric casing.
Fix: Reduce heat next time and handle gently. Patch small tears with iron-on fabric tape.
Maintain a Drying Schedule
Regular care extends your duvet’s life and keeps it hygienic.
- Duvet cover: Wash every 1 to 2 months
- Duvet insert: Wash every 2 to 3 months for optimal hygiene, or every 1 to 2 years for light use
Air out your duvet every morning by pulling back the covers. This lets overnight moisture evaporate and prevents dampness buildup. Always wash and fully dry before seasonal storage.
Frequently Asked Questions About Drying a Duvet
Can you put a duvet in the dryer?
Yes, most duvets can go in the dryer as long as the care label permits it. Use a low heat or air fluff setting and add 2 to 3 tennis balls or dryer balls to prevent clumping. Expect the cycle to run 4 to 6 hours minimum.
How long does it take to dry a duvet?
Machine drying typically takes 4 to 6 hours on low heat. Air drying can take up to 24 hours depending on humidity, temperature, and airflow. Thick down-filled duvets take longer than synthetic ones.
What happens if you dry a duvet on high heat?
High heat can scorch fabric, melt synthetic fibers, and strip natural oils from down feathers. This causes brittleness, permanent loft loss, and clumping. Always use low heat or air fluff to protect your duvet.
How do you dry a duvet without a dryer?
Air dry the duvet on a sturdy clothesline or wide drying rack in direct sunlight. Rotate it every few hours for even drying and use a fan indoors if needed. Expect up to 24 hours for complete drying.
How do you know when a duvet is fully dry?
Press your hand deep into the center of the duvet. It should feel warm and completely dry with no cool or damp spots. If you detect any moisture, return it to the dryer or line for another 30 to 60 minutes.
Should you dry a duvet inside its cover?
No. Always remove the duvet from its cover before drying. A wet duvet inside a cover creates machine imbalance, restricts airflow, and leads to uneven drying and clumping.
Key Takeaways for Drying Your Duvet the Right Way
Properly drying a duvet takes time, but the payoff is a fresh, fluffy, long-lasting comforter. Always check the care label first, separate the duvet from its cover, and use low heat with dryer balls to restore loft. Stop every 30 minutes to fluff and redistribute the filling, and never store the duvet until the center feels completely dry. By following these steps, you’ll protect your investment and enjoy cleaner, more comfortable sleep for years to come.