
How to Make a Bed With a Duvet
Nothing says comfort and care like a perfectly made bed, especially one layered with a plush duvet that invites you to relax. But if you’ve ever struggled with lumpy corners, mismatched layers, or a duvet that slips out of place, you’re not alone. Knowing how to make a bed with a duvet properly transforms your bedroom into a sanctuary of order and style. This guide delivers step-by-step instructions, pro tips, and design insights to help you achieve a hotel-quality finish at home. You’ll learn how to layer foundation pieces correctly, insert a duvet like a pro, fold sheets crisply, and style pillows for visual impact, all while ensuring long-term comfort and easy maintenance.
Start with Mattress Prep
Before any fabric touches the bed, ensure the mattress is clean and protected. This foundational step prevents allergens, stains, and wear over time.
Install a Mattress Protector
Slide a zippered mattress protector over the entire mattress to seal it from dust mites, sweat, and spills. Choose one that matches your specific mattress depth rather than a one-size-fits-all model for a snug fit. If your mattress hasn’t been protected before, vacuum it thoroughly first. A protector extends its life and keeps your sleep surface hygienic without changing how it feels.
Add a Topper or Pad (Optional)
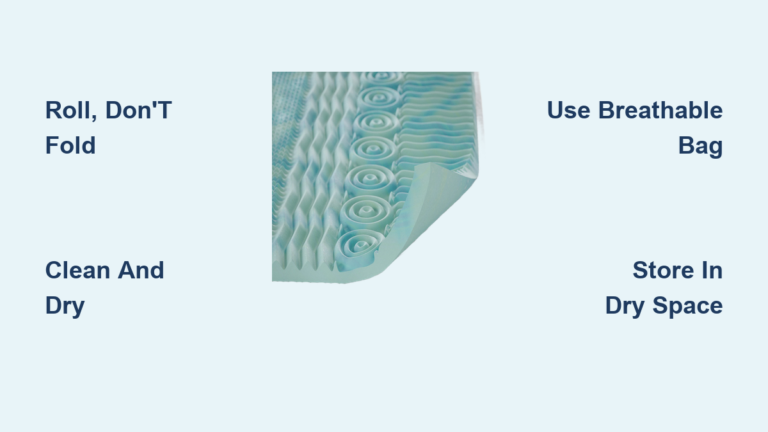
For extra comfort, place a mattress topper on top of the protector. Use memory foam for pressure relief or wool for natural temperature control. If the topper lacks non-slip backing, secure it with a gripper pad. Quilted mattress pads also work well for light cushioning and spill resistance.
Attach a Bed Skirt (If Used)
Iron the bed skirt first to remove wrinkles. For full-style skirts, lay it over the box spring before placing the mattress. For three-sided elastic types, stretch it around the bed frame, leaving the open side at the headboard. Align the skirt’s seams with the bed corners for a clean, tailored look.
Secure the Fitted Sheet
The fitted sheet is your base layer, serving as the direct contact point between body and bedding. A loose or bunched sheet ruins the entire look.
Choose the Right Size
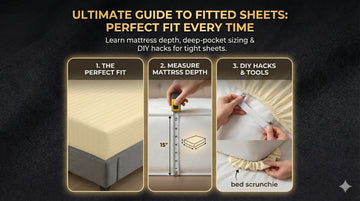
Use deep-pocket fitted sheets if your mattress is thick or has a topper. Measure your mattress height and match it to the sheet’s depth rating. Standard sheets fit up to 15 inches, while deep-pocket versions go up to 22 inches.
Apply Corners Tightly
Lay the sheet on the mattress in the correct lengthwise orientation. Start with the hardest-to-reach corner, pulling the elasticized edge over the mattress corner. Ensure the seam of the sheet aligns exactly with the top corner of the mattress. Repeat for all four corners, checking that none pop off during the process.
Layer the Flat Sheet
A flat sheet adds protection and allows for breathable layering. Most high-end hotels use them, and nearly 60% of Americans consider them essential.
Place Sheet Upside Down
Lay the flat sheet centered on the bed, with its top edge aligned to the mattress top. Flip it so the finished side faces down. This ensures the hem shows correctly when folded back over the duvet. Ensure generous width and length to prevent sheet tug-of-war.
Tuck with Hospital Corners
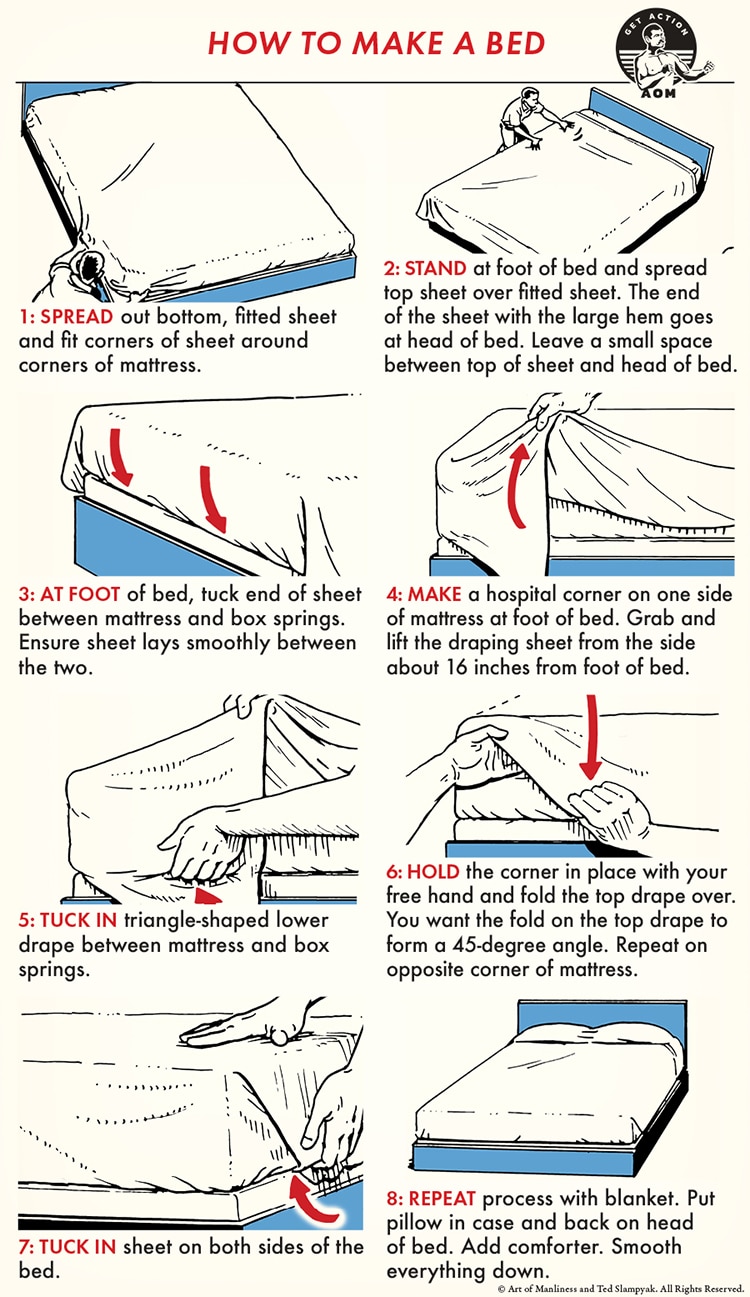
Tuck the bottom edge under the foot of the mattress. Then create hospital corners on both sides using this sequence:
- Lift the side hanging fabric approximately one to two feet away from the corner, pulling it up at a 45-degree angle to form a triangle.
- Lay the triangular flap down onto the top of the mattress.
- Tuck the excess hanging fabric (the vertical portion) neatly under the mattress.
- Drop the triangular flap down and tuck the remaining edge under the mattress.
This technique keeps the sheet tight and wrinkle-free, even after tossing and turning.
Add Warmth Layers
Blankets and quilts provide adjustable comfort and visual texture. Layer them now, before the duvet.
Insert a Lightweight Blanket
Place a cotton or wool blanket over the flat sheet. Tuck it in with the sheet for a secure feel, or leave it loose for easy removal. In summer, skip the duvet and use just the blanket and sheet. Lightweight options like gossamer cotton work year-round, while thicker wool or fleece adds winter warmth.
Position a Quilt or Coverlet
Drape a quilt or coverlet over the blanket. Belgian flax linen quilts offer excellent durability and washability. Fold it back at the top to expose the flat sheet, creating a polished, layered effect. In warmer months, this may serve as your top layer.
Insert and Arrange the Duvet
The duvet is the star of the show, fluffy, warm, and easy to style when done right.
Pick the Right Duvet Insert
Choose an insert 2 inches larger than your cover (for example, a 92-inch insert for a 90-inch cover). This prevents gaps and gives a full, luxurious look. Shake the insert vigorously before inserting to distribute filling and maximize loft.
Close the Duvet Cover Securely
Insert the duvet through the opening, preferably a zipper rather than buttons for durability. Use corner ties inside the cover to anchor the insert and stop shifting. Smooth out lumps by gently kneading the surface until the filling distributes evenly.
Lay the Duvet Flat
Spread the duvet evenly over the bed, allowing equal overhang on both sides. Smooth from center out to eliminate wrinkles. For a clean hotel-style look, fold the top edge back 6 to 12 inches to reveal the flat sheet beneath. You can also fold the duvet in thirds or quarters and place it horizontally across the foot of the bed for a less formal look.
Style with Pillows

Pillows add comfort and visual depth. Arrange them in layers from back to front.
Fluff Sleeping Pillows
Place two sleeping pillows against the headboard. Squeeze them from the sides to restore shape. Match firmness to sleep position: soft for stomach sleepers, medium for back sleepers, firm for side sleepers.
Stack Decorative Pillows
Follow this order from back to front:
- Euro pillows (26-inch square), placed behind sleeping pillows.
- Standard shams, matching sleeping pillows, placed in front of Euros.
- Lumbar or accent pillows (18 to 22 inches), centered at the front for color and texture.
Size Inserts Larger Than Covers
Use inserts 2 inches bigger than pillow covers for a plump, high-end look. Down inserts work best for large backrest pillows, while synthetics are fine for small accents.
Finish with the Karate Chop
Tap the center of each pillow sharply with the side of your hand. This creates a natural indentation and relaxed, lived-in style. Use an odd number of pillows (3, 5, or 7) for visual balance.
Drape a Throw Blanket
The final touch adds warmth and style without disturbing the main layers.
Fold or Scrunch at the Foot
Fold a throw in half or thirds and drape it across the foot of the bed. For a casual look, loosely scrunch it off-center. Use natural fibers like cotton, knit, or faux fur for texture.
Match Room Aesthetics
Coordinate the throw’s color with decorative pillows. Neutrals (white, gray, beige) create calm; bold colors or patterns add energy. Mix textures like linen, fleece, and cable knit for tactile interest.
Adapt for Seasons

Adjust layers based on temperature to stay comfortable year-round.
Lighten in Summer
Remove heavy blankets and quilts. Switch to a lightweight duvet insert or use only a top sheet and coverlet. Fold the duvet to the foot of the bed or remove it entirely. Choose breathable fabrics like cotton, linen, or bamboo and avoid microfiber, which traps heat.
Layer Up in Winter
Build warmth with this order: fitted sheet, flat sheet, wool blanket, quilt, duvet. Fold the top edge of the duvet back so layers can be easily pulled up at night. Some add a second blanket or even double duvets in very cold climates.
Avoid Common Mistakes
Even small errors can ruin an otherwise perfect bed.
Don’t Over-Layer
Too many thick textiles look cluttered and feel oppressive. Stick to 3 to 5 layers max: sheet, blanket, quilt, duvet, throw.
Don’t Skip Ironing
Wrinkled bed skirts or sheets break the clean look. Always iron skirts and press flat sheets before making the bed.
Don’t Mismatch Proportions
Ensure pillow sizes and blanket drops suit your bed size. King beds need larger Euros and more pillows than twins.
Don’t Ignore Color Cohesion
All layers should align with your room’s palette. Start with neutral sheets and introduce color through duvet covers, pillows, and throws.
Use the Hotel Triple Sheeting Trick

Luxury hotels use this method for crispness and easy cleaning.
Layer Two Top Sheets
- Place fitted sheet.
- Add flat sheet.
- Lay blanket or thin duvet.
- Place a second flat sheet over the blanket, tucking it in tightly at sides and foot.
This encases the middle layer like a built-in duvet cover. In the morning, simply strip the top sheet, leaving the rest intact.
Maintain Your Bed’s Longevity
A well-made bed lasts longer with proper care.
Vacuum the Mattress Regularly
Before reapplying protectors, vacuum the mattress to remove dust and debris, especially on older models.
Wash Duvet Covers Weekly
Sheets and duvet covers should be laundered every 7 to 10 days. Air out duvet inserts monthly and wash every 6 months unless soiled.
Fluff Pillows and Inserts
Knead sleeping pillows and duvet inserts weekly to prevent clumping and maintain loft. Store spare inserts in breathable cotton bags.
Invest in Quality Materials
Choose Belgian linen, organic cotton, or high-thread-count natural fibers. They resist pilling, last longer, and feel better against the skin than synthetics.
Frequently Asked Questions About Making a Bed with a Duvet
What size duvet insert should I buy for my cover?
Choose an insert that is 2 inches larger than your cover in each dimension. For example, use a 92-inch insert for a 90-inch cover. This prevents a shrunken look and ensures the duvet appears full and fluffy.
How often should I wash my duvet cover and sheets?
Wash sheets and duvet covers every 7 to 10 days. Air out duvet inserts monthly and wash them every 6 months unless they become soiled. This routine keeps your bed hygienic without over-wearing the fabrics.
Should I use a flat sheet under my duvet?
Nearly 60% of Americans consider flat sheets essential. A flat sheet protects your duvet from body oils and dirt, extending its lifespan. It also allows for breathable layering and temperature control throughout the night.
How do I keep my duvet insert from shifting inside the cover?
Use the corner ties inside your duvet cover to anchor the insert at each corner. After inserting, smooth out lumps by gently kneading the surface to distribute the filling evenly. This prevents clumping and keeps the duvet looking neat.
What is the hotel triple sheeting method?
Triple sheeting involves layering a fitted sheet, flat sheet, blanket or thin duvet, and a second flat sheet on top. The top sheet is tucked in tightly at the sides and foot, encasing the middle layer like a built-in duvet cover. This creates a crisp look and makes morning bed-stripping easier.
How do I style pillows for a hotel-quality look?
Arrange pillows back to front: Euro pillows first, then standard shams, then lumbar or accent pillows at the center front. Use inserts 2 inches larger than covers for a plump appearance. Finish with a karate chop in the center of each pillow for a relaxed indentation, and use an odd number of pillows for visual balance.
Final Thoughts on Making a Bed with a Duvet
Making a bed with a duvet combines technical precision with personal style. Start with a protected, clean mattress, then build layers from fitted sheet to duvet using proper techniques like hospital corners and corner ties. Style your pillows back to front, finish with a throw, and adjust your layers seasonally for year-round comfort. With quality materials and consistent care, your bed will look luxurious, feel inviting, and stand the test of time. Try implementing one new technique this week, whether it’s mastering hospital corners or perfecting the karate chop, and notice the difference in both appearance and sleep quality.