
How to Tie Duvet Cover Loops
Changing a duvet cover can feel like wrestling with a giant fabric burrito. The insert bunches, the cover twists, and corners refuse to stay put, often because the duvet cover loops aren’t tied correctly. The real secret to a crisp, hotel-style bed lies in anchoring those corner ties before you ever start rolling or flipping.
In this guide, you’ll learn exactly how to tie duvet cover loops, two reliable insertion methods, and what to do when your insert has no loops at all. These techniques turn a frustrating chore into a quick, one-person task.
Set Up the Duvet Cover and Insert
Turn the Cover Inside Out
Start by flipping the duvet cover inside out. Lay it flat on the bed with the opening at the foot of the bed and the interior seams facing up. Smooth out wrinkles so the fabric lies flat and ready for alignment.
Layer the Insert on Top
Place the duvet insert directly on top of the inside-out cover. Match the top edges precisely so the corners line up. A properly sized insert fills the cover without straining the seams or floating loosely inside.
Anchor the Top Corners First

Locate Ties and Loops
Reach into the top corners of the cover to find the small fabric ties sewn inside. Then check the duvet insert for loops at each corner. These loops are designed to receive the cover’s ties and lock everything in place.
Tie the Top Corners Securely
Thread each cover tie through its matching insert loop and tie a double knot or secure bow close to the corner. If your insert has no loops, wrap the tie tightly around the duvet corner and knot it firmly. Securing the top corners first creates a fixed anchor so the insert’s weight doesn’t pull everything out of alignment.
Pro Tip: Always tie the top corners before flipping or rolling. This single step prevents most of the common frustrations with duvet insertion.
Use the Traditional Method

Pull the Cover Over the Insert
With the top corners tied, reach into the bottom opening of the cover. Grab the tied corners through the fabric and pull the cover up and over the top of the duvet. This flips the cover right-side out while keeping your anchor points intact.
Slide and Smooth the Fabric
Once the top is flipped, gently slide the cover down over the rest of the insert. Use your hands to smooth wrinkles as you go. Keep light tension on the tied corners to maintain alignment.
Tie the Bottom Corners
After the cover is fully in place, locate the bottom corner ties. Attach them to the insert loops, or wrap and knot them around the corners if no loops exist. This stops the insert from riding up at the foot of the bed.
Try the Burrito Method
Roll the Layers Together
With the cover inside out and the top corners already tied, begin rolling both layers together from the top of the bed toward the opening. Keep the roll tight and even, tucking the sides in as you go. The result should look like a fabric burrito.
Flip the Open End Over the Roll
When you reach the opening, pull the open edge of the cover right-side out over the entire rolled bundle. Fasten the closure (buttons, zipper, or snaps) to hold the shape in place.
Unroll to Reveal a Smooth Fit
Unroll the bundle from the top back toward the foot of the bed. The duvet will slide smoothly into the cover as you go, with the pre-tied corners keeping everything centered.
Secure the Bottom Ties
Once unrolled, check the alignment and tie the bottom corner ties to the insert loops. Give the duvet a firm shake to settle the filling and remove creases.
Handle Missing Loops on the Insert

Tie Directly Around the Corners
Many older or budget duvet inserts don’t have loops. Don’t leave the cover ties loose. Instead, wrap each tie tightly around the physical corner of the insert and knot it firmly. This mimics the function of a loop and keeps the insert from shifting.
Avoid Fabric Damage
Knots should be tight enough to hold but not so tight they compress the filling or stress the seams. A simple square knot works well. If the ties are too short, consider replacing them with longer ribbon strips.
Optimize Tie Placement for Stability
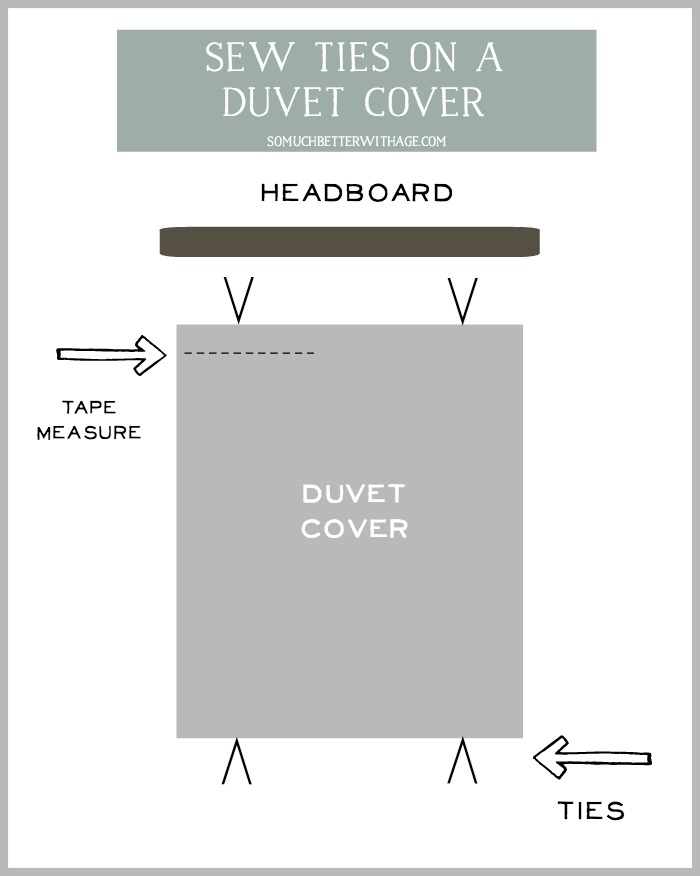
Prioritize the Top Corners
The top two ties bear the most weight and prevent slippage. Always secure them before pulling or rolling the cover. Skipping this step is the number one cause of misalignment.
Secure the Bottom and Side Ties
After the cover is on, tie the bottom corners to stop the insert from shifting upward. If your cover has side ties, use them to prevent horizontal movement, especially helpful for oversized duvets.
Avoid Common Mistakes
Don’t Skip the Final Shake
After tying all corners, hold the duvet by the edges and shake it vigorously. This distributes the filling evenly and settles the insert into the corners. Skipping this step leads to lopsided warmth and visible clumping.
Check for Twisted Fabric
Before closing the cover, make sure the fabric isn’t twisted. Look at the pattern alignment or seam direction. A twisted cover will bunch under the sheets and ruin the smooth finish.
Match Sizes Before You Start
A mismatched insert and cover causes constant shifting. If the insert is too small, it floats; if too big, it strains the ties. Always verify dimensions before purchase.
Care for Ties and Loops Over Time
Untie Before Washing
Always untie loops before laundering. Knots can stretch or tear delicate fabric during the wash cycle. Tuck ties inside the cover or loosely tie them to themselves to prevent tangling.
Inspect for Wear Regularly
Check ties and loops every few months for fraying or loose stitching. A broken tie means one less anchor point. Repair small tears with a few hand stitches to prevent bigger damage.
Replace Broken Ties Promptly
If a tie snaps, replace it with a 6 to 8 inch ribbon or fabric strip. Sew it securely into the corner seam of the cover. Match the color for a clean look, or use white for invisibility.
Frequently Asked Questions About Duvet Cover Loops
What if my duvet insert doesn’t have loops?
You can still secure the cover by wrapping each tie tightly around the corner of the insert and knotting it firmly. This creates a makeshift anchor that mimics the function of a loop.
Should I tie the top or bottom corners first?
Always tie the top corners first. They bear the weight of the insert and keep it from sliding down during the insertion process. Bottom corners are secured after the cover is in place.
Can one person change a duvet cover easily?
Yes. Both the Traditional Method and the Burrito Method are designed for solo operation. Tying the top corners first is the key to managing the fabric alone.
How do I keep the duvet from bunching inside the cover?
Tie every corner securely, smooth the fabric as you go, and finish with a vigorous shake. Proper sizing also prevents bunching caused by excess fabric or a too-small insert.
How often should I check the ties and loops?
Inspect them every few months for fraying or loose stitching. Repair small issues immediately to avoid losing an anchor point during a cover change.
Can I add loops to a duvet insert that doesn’t have them?
Yes. You can sew small fabric tabs or ribbons into the corners of the insert to create loops. This gives you proper anchor points and makes future cover changes much easier.
Key Takeaways for Tying Duvet Cover Loops
Mastering how to tie duvet cover loops comes down to three essential habits: always tie the top corners first, choose the method that fits your style (Traditional or Burrito), and secure every corner whether loops exist or not. A quick shake at the end distributes the fill and locks everything into place.
Start with your next cover change by checking the corner ties and loops first. With these techniques, you’ll get a smooth, wrinkle-free bed in minutes, no helper required.